LESSON 1 → 24/10/2023
In this first lesson, we talked about the role of the musician in free improvisation and the four main topics to be discussed in this sense: melody, timbre, harmony and rhythm.
I was then introduced to various extended techniques, both in the field of timbre (jet whistle, jet whistle slap, slap, side sucking, spit sucking, high note multiphonics) and in the field of rhythm and timbre (phonetic alphabet: [ch] [chi] [cha] [cho] [tsi]). A more detailed explanation follows:
- Glissando. On a standard flute we use two main approaches to carry out this technique. On the one hand, we use the smallest intervals possible to create a scale, i.e. the semitone. The other approach is to use the flexibility of the embouchure (turning thd flute inwards or outwards). You can also gradually close and open the rings to create a glissando effect.
On Anne's flute the glissando effect is much greater because she has the possibility of playing quarter tones.
- Micro intervals. This term refers to intervals smaller than a semitone. On a normal flute we use the partially open holes or certain fingerings to sharpen or flatten the tone.
- Singing. By singing the same note as we play, we can create different tone-colors.
We can also use this extended technique to play polyphony by singing a different line to than the one we are playing.
- Harmonics. Additional frequencies produced when a note is played, which determine the timbre of the instrument. They are influenced by the embouchure, the air pressure, and the position of the fingers on the keys. To get different colors, we can play the same note with different fingerings.
- Multiphonics. Two or more notes sounding at the same time. Some useful resources for multiphonics are:
· Carine Levine, The Techniques of Playing the FLute, Vol 1 and 2, Verlag Bärenreiter, ISBN 3-7618-1595-6.
· Robert Dick, Tone Development Through Extended Techniques, Multiple Breath Music Company NY, ISBN 0-939407-00-0.
- Slap Tongue. Produced by blowing short notes with the tongue, without any air pressure from the lungs, producing a very articulated sound with the tongue.
- Tongue ram. Created by closing the mouthpiece with the whole mouth, and then making a larg and very rapid movement of the tongue, against the teeth.
- Flutter-tonguing. The tongue flutters like a flag in the oral cavity, creating an intermittent stream of air that sounds like the tremolo of a stringed instrument. It is important that the tongue must be loose.
- Trumpet sound. By pressing the lips together, as on a brass instrument, it is possible to play in the hole of the mouthpiece, or on the flute by removing the mouthpiece.
- Whistle tones. Requires a controlled embouchure and very low air pressure.
- Jet Whistle. By closing the whole mouthpiece with the mouth and blowing directly with great force. (Möller, 2005, p.7)
Finally, we did some free improvisation together, keeping in mind the four big words of this lesson (rhythm, melody, timbre and harmony) and the new techniques explained.
When Anne told me to start improvising, I was completely lost. On the one hand, I think the freedom that this tool offers can be overwhelming, especially if you are experiencing it for the first time. On the other hand, my inner voice as a classical musician was thinking about what to do, how to start improvising in a way that was creative, interesting and positively validated by Anne.
Eventually we decided to switch roles, Anne would start improvising and I would follow. Then we did the opposite.
If I had to describe the experience in one word, it would be unique. I was able to play and experiment in a creative way with the techniques I had learned in that first lesson and, although I was still nervous, I was much less judgmental of my playing and focused more on reacting to what Anne was playing (active listening).
The flute Anne plays is different from the one we are used to in conservatories. The flute typically uses the Boehm system. This is a system designed by the flutist Theobald Boehm in the 1830s. His design was revolutionary at the time because of its new key system, which allowed for easier execution and a wider range of tones.
Although revolutionary in its time, it is now outdated, as there is a system that improves it: the Kingma system.
This is the system used on Anne's flute. As described on her website:
A Kingma System® flute is, in all respects, a Boehm system flute with a C# trill. All of the normal touch pieces and fingerings are where you would expect them to be. What makes this flute so unique is that, in addition to the standard Boehm mechanism, there are six extra keys. This is made possible through the use of the patented key-on-key system that has been used so successfully on our alto and bass flutes for many years. These keys are used to produce six of the seven quartertones and multiphonic vents which are “missing” on the normal French model flute. The seventh “missing” quartertone is achieved by using the C# trill key together with the normal C key. The other five quartertones are produced by using the normal, open hole keys.
This first session made me think: if there is a system for our flutes that is better than the one currently in use, why is it not widely used by flutists?
Perhaps the word "conservatory" goes beyond "preserving" the musical tradition in terms of style of interpretation, but also within the instruments. If we do not open our eyes to today's society, we exclude a wider audience, instruments with greater possibilities, which allow us to play more easily and which can help us to improve our technical and creative skills.
THE LESSONS
As a part of this research’s methodology, I was led through four sessions focused on the development of free improvisation with Anne La Berge [1].
During these sessions, I learned different extended techniques to use when improvising with the flute and piccolo, how to integrate this tool into my daily practice based on a classical repertoire and the different possibilities it offers in order to find my own personal voice.
All of this is narrated in the first person, as this reserch has an autoethnographic qualitative methodology, in which I am the main subject of my own research.
LESSON 2 → 15/11/2023
Working with electronic flute and piccolo.
First, I would like to quote Anne's comments on electroacoustic music on her website:
“American electro acoustic music is so diverse these days that I cannot draw specific correspondences between such a large country and the small and concentrated scene in Amsterdam. The part of my own roots that I have an intimate connection with is my dedication to the experimentalists including John Cage, Alvin Lucier, Pauline Oliveros and Annea Lockwood. I have also found younger electro acoustic artists such as Katherine Young, Sam Pluta, Lauren Sarah Hayes and Natascha Diels to be sources of inspiration for me. In other words, the pioneers and the mavericks who have developed their own imaginative musical languages remind me of my earlier training and give me food for thought regarding my work here on the other side of the ocean.” (Webdev, 2019).
For this lesson I had the chance to go to Splendor Amsterdam, the place where her projects come to life. She taught me about the technical material needed to amplify the flute and piccolo and how to connect them.
Then I learn different sounds, effects, timbres that you can do with these instruments when they are amplified. After that we did different improvisations like the one I attach below:
Working with electronics is such a unique experience, especially coming from a classical background. It amazes me how, after seventeen years of playing this instrument, I can still discover so many new timbres and ways of experimenting with them.
In this particular lesson we talked about some effects or techniques on the flute:
- The fart effect. This is done on one side of the flute by sucking in saliva with a closed mouth.
- Circular breathing. This technique is used more by saxophone and clarinet players, as it is more problematic on the flute because of the special embouchure and way of blowing. The most difficult part is teaching the brain how to coordinate inhalation and exhalation. To start practicing, take a note such as D6 and try to blow out while inhaling with your nose. Another exercise is to try playing with a lot of noise and singing. This will distract you from what might be going on.
Then try singing the first note of Taffanel Ej4 and play the exercise legato at the same time. Breathe in with your nose on the first note of each measure.
- Roar effect with the microphone. This is done by making different consonants with the throat (such as "whuwhuwhu" or "grgrgr") very close to the microphone and using the flute resonance.
- Another interesting effect is to inhale while interrupting with the tongue.
We did an improvisation with the microphones using different extended techniques: glissando, whistle tones, over blowing, slaps, percussion effects (“shshsh”, “chch”), roaring, frulatto-singing, air effect (like the wind in the ocean) or harmonics.
I found the change of roles very interesting. The way we sometimes just use effects, other times there was a clear tempo, a melody, the way we used each other's motives and changed the harmony (sometimes polyharmony, sometimes a clear tonality, sometimes just percussive rhythms). Also, how we created contrasting moments, using high pitch, low pitch, a very wide dynamic range, a very wide color range and different textures.
When we finished improvising, I checked the recording and couldn't believe we had been playing for twenty minutes. Time flies when you're having so much fun with your instrument, playing and experimenting with new things, using your creativity, imagination, ears and knowledge, but from a very non-judgmental place.
My favorite quote from Anne in this lesson was after trying these extended techniques with the exercises. For me it was such a challenge and so different from what I was used to that at one point my mind was confused and I didn't know what I was doing. Then I burst out laughing and Anne said: "That's also part of improvising: to have such a good time that you don't know what's right and what's wrong". This quote describes very well the difference between classical music and free improvisation. In classical music technical perfection is required, whereas in free improvisation a mistake can lead to an interesting new sound. I think the key is to learn to enjoy the process, the mistakes, to put perfection aside and focus on experimenting, on creating something new, which is the true mission of the artist.
As for the technical part, which I can apply to my personal practice as a classical performer, free improvisation has made me more aware of the positioning of my mouth muscles when playing. It has allowed me to experiment with new positions of the tongue and jaw, to create different resonances, to discover new colors that are much more extreme than those allowed in classical music, as well as a greater dynamic range. Playing with mistakes, leaving the patterns of perfection imposed by classical music, giving space to listen more to my body and react on instinct.
LESSON 3 → 28/11/2023
On the lesson, we focused on improvising from the classical repertoire, specifically the first and second movements of the Reinecke Concerto for flute.
One important discovery was the impact of free improvisation on my body and its effects on my playing. After a couple of improvisations based on the piece I was currently working on, I mentioned that I had been struggling to find my sound during a previous flute lesson. However, now my sound was big and effortless. Anne responded by saying that my body was held in.
Upon reflection, I concluded that the goal in classical music performance is perfection. When improvising with Anne, even if playing from a classical repertoire, creative freedom and active listening are the most important aspects. Allowing space for the body and mind to relax translates into better sound and technique, including relaxed fingers and hands.
When asked about the difficulty of the first phrase, I explained that tuning between large intervals, particularly in the high register while maintaining vibrato and clear direction, can be challenging. At the same time, the rhythm and fingerings have to be clear and at the appropriate tempo, and the range of dynamics should be maximized. It is important to balance technical precision with personal interpretation.
To achieve this, it is recommended to separate technical practice from creative exploration, allowing for both perfection and freedom.
It is important to note that free improvisation does not necessarily require fewer technical skills than classical music, nor does it mean that this type of performance doesn't have challenges. The distinction lies in the approach to these challenges, rather than the level of difficulty itself. The above statement highlights the difference between being concerned about technical proficiency and surpassing those concerns.
After reflecting on the score, we focused on passages that were particularly challenging.
The discussion begins with the endings. To improve them, we first practiced several improvisations using the extended techniques I learned in previous sessions.
Then, we attempted to sing while playing phrases with this type of ending, striving for accurate pitch.
The outcome was a broader, deeper, and more relaxed sound, resulting in longer musical phrases while using less air. This is due to the body functioning optimally, at its best.
On the other hand, we worked on certain intervals of high difficulty such as:
· D#6 – F5. Finger you D#6 and without changing your fingers let the note drop. Improvise with that. The approach was more successful because the focus was on identifying the notes that were closest in resonance, rather than searching for overtones of the F#.
· F#. Practice with overtones. A# fingering. Improvise on that.
· E6 multiphonic. Use the A5 fingering and add frullato. This exercise can help you find a bigger, more in-tune sound and it is easier to play E6.
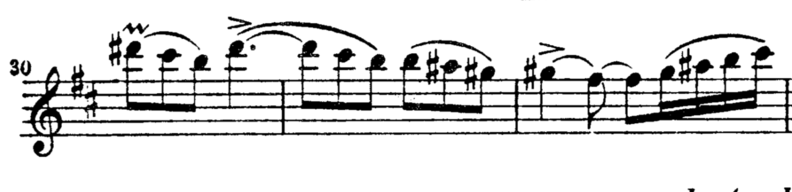
Additionally, improvisation exercises were conducted on a challenging passage in bar 223 (as shown in the picture below). The exercises focused on freeing oneself by experimenting with free improvisation, resulting in improved proficiency with the fast and intricate fingerings required in this passage.
Furthermore, the first page of the second movement was also subject to improvisation (first audio), with the melody played by myself and Anne providing improvisation (second audio). After that, Anne played it and I improvised (third audio).
Finally, I played it one last time. It amazed me how it sounded much more energetic and the sound was bigger and more relaxed.


LESSON 4 → 16-12-2023
ELECTRONICS
During the first part of the session, Anne explained her use of electronics.
We began by testing a reverb set-up. She discussed both the technical operation and the settings she employs during performances. During performances, Anne connects her equipment to an iPad for easy management of settings. Next, she demonstrated a reverb that also changed pitch (see audio example).
One of Anne's setups for concerts is referred to as a 'timeline'. It progresses through various settings and controllers, programmed to provide the necessary settings for each piece's interpretation or improvisation.
'Patches' are used to refer to different programs and methods of altering the sounds. During the session, we experimented with a few of them.
Here are some examples of the different effects we tested:
-Playing with a reverb effect.
-Roar effect.
- Effect that accentuates the acute partials. We recorded an improvisation and used it as a sampler and then distorted it with different effects.
-E flat distortion. Then the same distortion but adding reverb.
-This one responded to the peaches that were turned on.
-After a while it started to sound very low and then it would come again to normal.
- This effect worked for very high and soft frequencies such as whistle tones.
-Effect for very low frequencies.
-You can also add music to play on top: minimalistic music, beats, cathedral music.
-First turn the bass up and then play percussion effects. A very nice bass effect with the flute can be done by doing a slap and leaving the mouth a bit open and the tongue out. With the resonance of my mouth and the flute, I can make the effect of a percussion instrument. It sounds like a very low bass.
- IMPROVISATION WITH EXCERPTS.
· MOZART- The Magic Flute.
The task is to perform this excerpt in the style of Mozart, with clear articulation and simplicity.
First the two of us did an improvisation inspired by the excerpt, using the electronics.
Then, Anne improvised while I played the excerpt, and vice versa. During the free improvisation exercises, we practiced playing with the metronome giving the upbeat instead of the beat. This exercise helped us to maintain tempo and precision with the rhythms.
Additionally, we imagined the metronome while playing some parts of the excerpt and imagining others but without playing. This is an exercise to practice how to maintain a steady tempo and internal subdivision. It is important to have a clear understanding of these concepts in order to perform the exercise accurately.
· BRAHMS – Symphony 4
We did this excerpt with a reverb effect that highlights the low frequencies. Once again first I improvised and Anne played, and right after that, I played it and Anne improvised.
Playing with this effect created a very dramatic, dark and unpredictable atmosphere, like a horror movie. This helped to find the color of the sound to use for this excerpt, looking for an interpretation in accordance with the expressiveness and history of the work.
Next, we did an improvisation, both using motifs from the excerpt.
In this excerpt for me it was difficult to play large intervals (not breaking, having great flexibility and good tuning), maintaining a good tempo, the tuning at the end of phrases and general phrasing.
1. To work on the difficulties in large intervals:
· Overtone series of F#. With the F# sharp fingering try to find where the note is and then when playing with the real fingering you already have prepared the speed of the air, the embouchure needed and the body relaxed in the right way.
· Overtone series of E. The B is the overtone of the E. Do the same exercise than with the previous interval.
· To feel the pulse, we put a prominent reverb effect and try to release the first note, exaggerating. This also helped with the expression and intonation, because it helped to feel the first beat of the bar and not giving emphasis to the second note.
· PROKOFIEV- Peter and the Wolf
We first improvised on motifs from this excerpt with an effect.
Then I played the excerpt and Anne improvised. It was the first time I was able to play that excerpt without any technical glitches.
This particular extract has a very high technical difficulty as the beat is equal to 176bpm. In certain passages, due to the difficulty, I felt that my hands were blocked and I could not have a perfect technique. Playing with Anne the technical glitches diminished, as I didn't feel the pressure to play it perfectly but to be experimenting with textures, effects, colors and listening to how Anne accompanied me with free improvisation.
This helped me relax and play without overthinking, which turned into improving my technique.
One of the challenges of this piece is the staccato and high register at the beginning. An exercise was conducted to determine the appropriate timbre and tuning while maintaining a short articulation.
· Play a multiphonic on a G, remembering that your thumb must be off. It helps to create space so that the high G doesn’t sound very stiff.
Play the G without caring if the high or the low harmonic sounds, do the same with the G#. It helps to find a looser and focus sound.
The final challenge was the fast and legato passage. To improve your practice, try playing random notes instead of the correct ones when you reach a difficult passage. This will help you to loosen up in that specific place.
· PROKOFIEV- Classical Symphony
The difficulties in this excerpt are the pianissimo in the high register, the octaves and keeping the rhythm and the tempo precise.
Some exercises that Anne suggested are:
1. For the octaves play the A with overtone from A. It would be the F#. Improvise on the overtones of A. Do the same with the other intervals, playing with the overtones. It is the same exercise as in the previous excerpt.
2. Then we practiced the excerpt with whistletones (using also the electronics to add more fun, different colors and textures, and to amplify the effect).
3. For the first A, practice it with multiphonics. Try to get a half hole with your finger.
After these exercises, we did one round where I improvised and Anne played and then the other way around.
One of my comments after the lesson that I would like to highlight was “Last week I had a lesson and couldn’t even play this excerpt’s first note. Today, without any practice I could”. When playing with Anne, I don’t focus on playing the right notes but on the joy that I am having. I am also busier in listening to her, to the new sounds I am making with my flute and to the creative part of the interpretation instead of the mistakes. Eventhough, there is a improvement, a still need to take care of the details.
Finally, Anne also suggested that while practicing in private using this free improvisation exercises, I explore where my tongue is and I can feel any tension in it.
· BIZET- Minuet L'Arlessiene
We followed the same steps:
- Free improvisation first
- I played and Anne improvised.
- We used in an effect with a lot of reverb. Anne plays and I improvise.
- I played it again while Anne improvises.
After this last interpretation, Anne commented: “The energy now is much more present”. Free improvising gave me a different perspective on how to interpret this excerpt and by playing around with the free improvisation, I could feel the idea that I wanted to transmit when playing it. Anne remarked, “Your impro is your emotional ‘how you feel about this’”.